Transforming Your Garage with Windows: A DIY Guide
Posted by Jennifer G. on Thursday, March 7th, 2024 | 18 views
Adding windows to your garage door is a game-changer. It’s not just about making your garage look cool; it’s about bringing in sunlight and upping your home’s curb appeal. You might think it’s a big deal to do, but with the right tools and some guidance, you can totally pull it off yourself. Let’s walk through how to add windows to your garage door and make your space shine.
Why Switch Up Your Garage Door Window?
Putting in new windows does more than make your garage look better. Here’s what you get:
- More Light: New windows flood your garage with natural light. It turns a gloomy space into somewhere you actually want to be.
- Looks Great: New windows can totally change how your garage and house look. You can pick styles that match your home, making everything look cooler.
- Adds Value: Fancy garage doors with windows can boost your home’s value. Buyers love stuff like that.
- Fresh Air: If you get windows that open, you can let in fresh air. This is great if you spend lots of time in your garage.
Pick Your Windows
Of course before your begin installation you have to pick the correct windows for you garage door. Garage door windows come in a variety of different styles, colors, sizes and thicknesses that are important to your garage door. To start simply measure out the desired cut-out you would like for your garage door. The cutout is the piece you will be removing from the garage. Once that is determined find out the thickness of your garage door. There are standard thicknesses but not all windows will be available for your garage. After the measures of course it is time to configure it with colors, and glass options!
Safety First
Before you start, remember safety is key. Here’s how to stay safe:
- Wear Gear: Put on safety glasses and gloves. You want to protect your eyes and hands.
- Secure the Door: Make sure your garage door is down and the opener is off. You don’t want it moving while you work.
- Use Proper Tools: Pick the right tools for the job and check they’re in good shape.
- Get Help: Having a friend around is smart. They can help and be there in case something goes wrong.
Tools You’ll Need
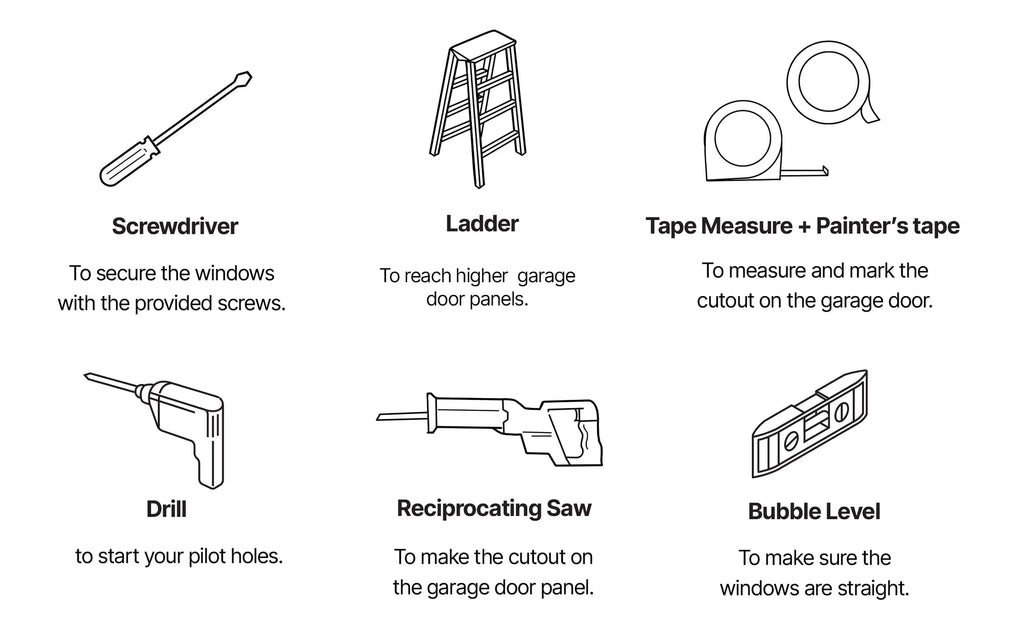
Here’s what you need to get started:
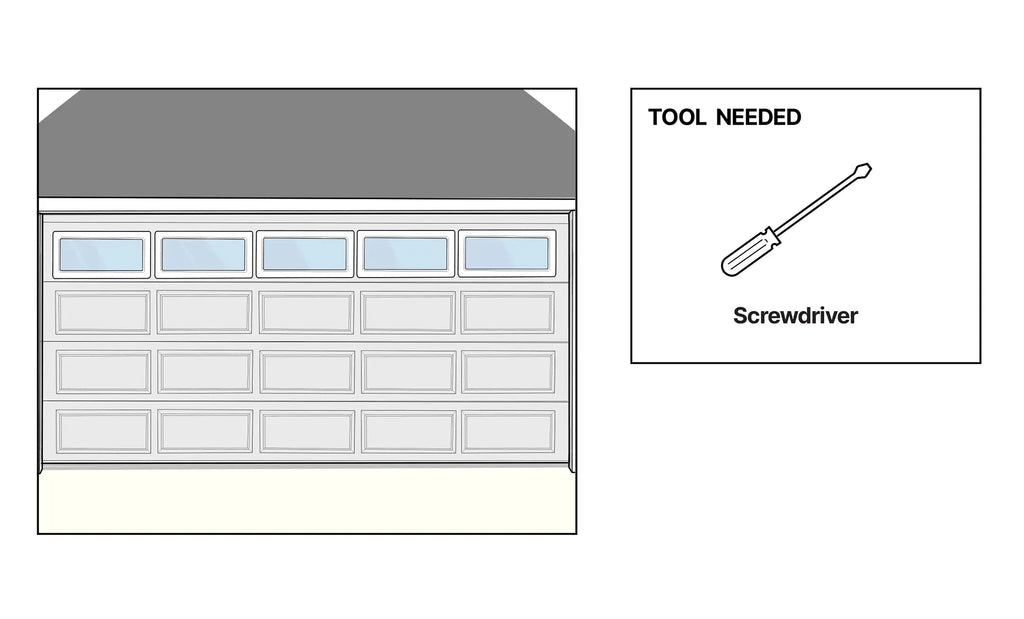
- Screwdriver: For fixing the windows in place.
- Ladder: To reach the higher panels.
- Tape Measure and Painter’s Tape: To mark where you’re going to cut.
- Drill: For starting holes for your saw.
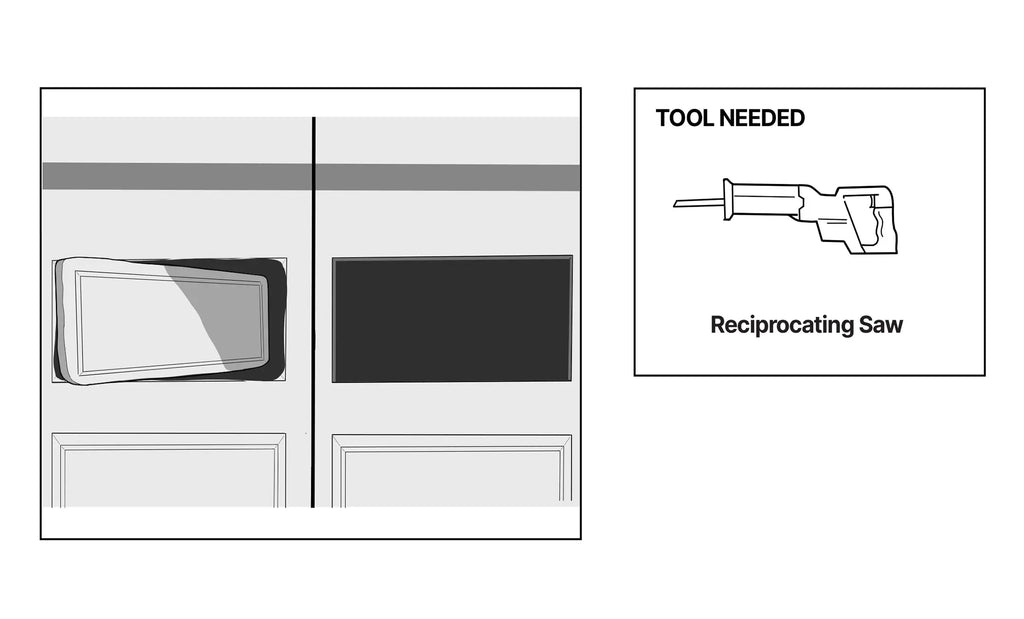
- Reciprocating Saw: To cut the garage door.
- Bubble Level: To make sure everything’s straight.
- Adhesion Promoter for Plastic: If you’re painting the frames.
Home Depot US or Canadian Tire (CA)
How to Install the Windows
Now that you have all the tools you need (and the second person), it is time to install the windows. Remember the hardest part of the installation is making the cut. Always measure twice and cut once.
*We recommend installing 1 window at a time*
*If you plan on painting the window frames, paint them before installation*
Step 1 – Unboxing the Windows:
Unbox the windows and make sure you have an outer frame, a glass unit, and an inside frame. The inside frame should be the ones with the screw holes. Check the packaging for screws, and preassemble them to make sure everything fits together.
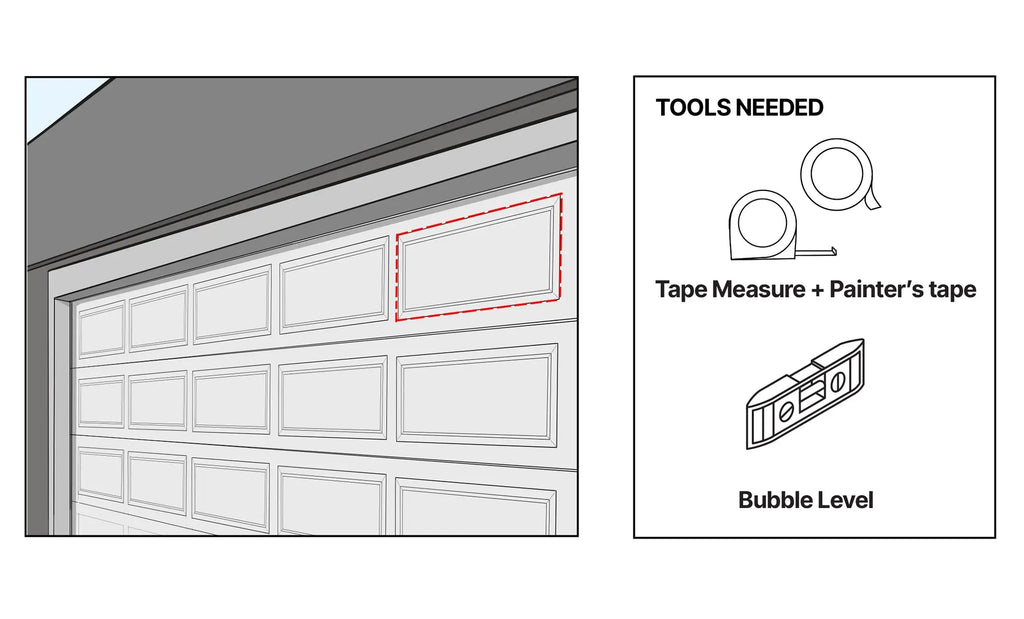
Step 2 – Marking the Cutout:
Using the provided measurements (from the product page, or through customer service) use the tape measure to draw out the cut-out dimensions. It is recommended to use the bubble level and the painter’s tape to mark out and make sure each dimension is straight.

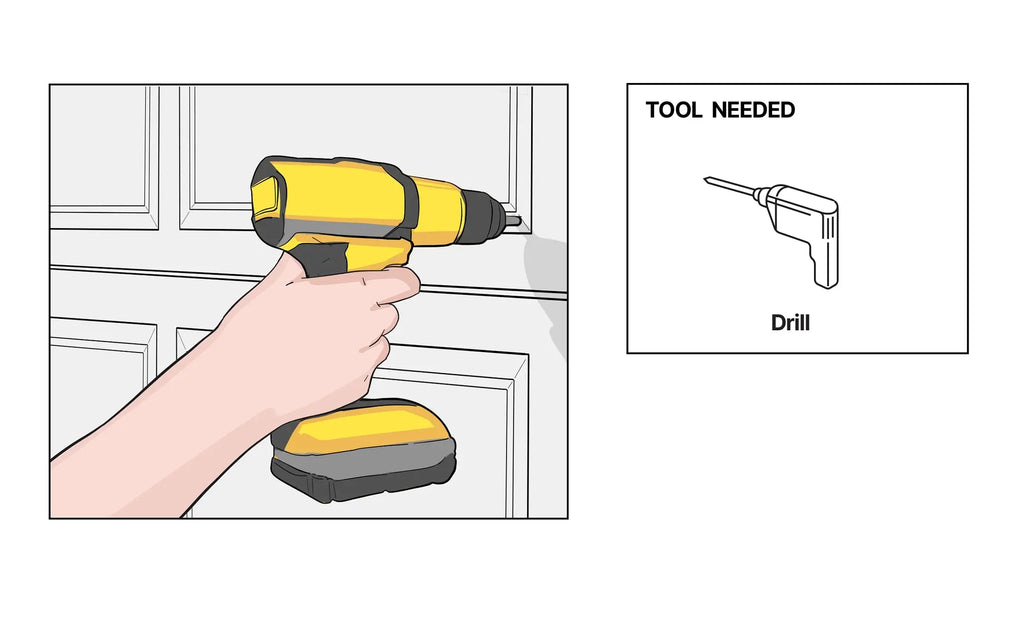
Step 3 – Drill Pilot Holes:
Now that you have your dimensions marked out on the garage door. Use your drill to put some pilot holes in your garage door. This way it will make it easier for your reciprocating saw to get started.
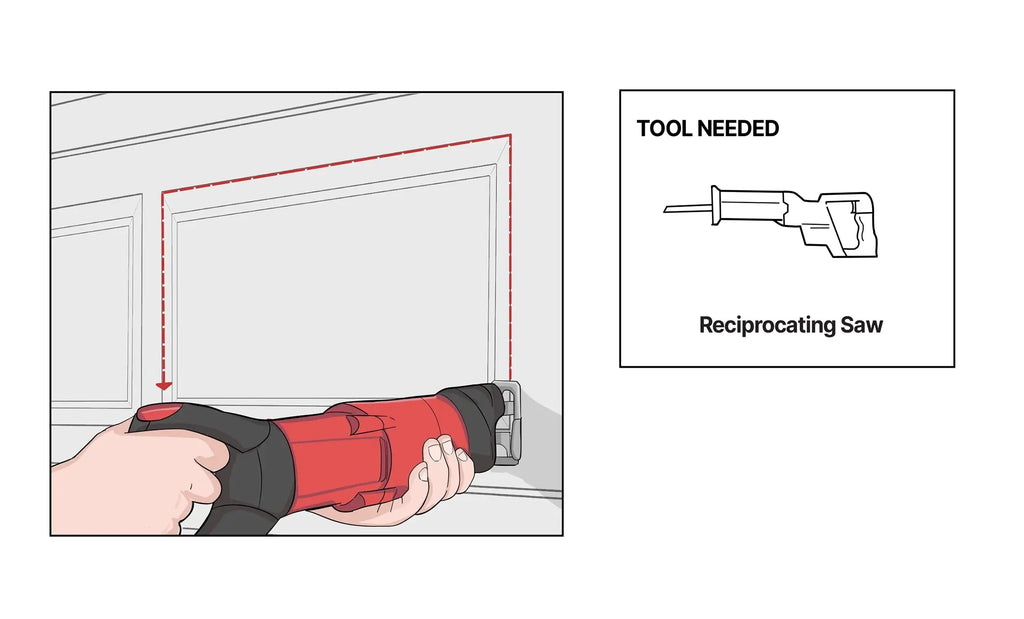
Step 4 – Cut the Opening:
Insert your reciprocating saw into a pilot hole and use it to cut along the drawn lines.
Step 5 – Remove Section and Trim:
After completing the initial cut remove the cut out section and trim down and spots you have have missed making sure the cutout is as straight as possible.
Step 6 Install Window (2 People Required):
Once you finished the cutout, place the front frame (one without the screw holes) into the opening. Have the second person hold the outside frame as you go inside the garage to place the glass unit into the opening. Once the glass unit is in place, put the back frame into the opening sandwiching the glass unit between the front frame and back frame. Secure both frames together with the screws provided. The screws should be snug but not overtightened, to allow for thermal expansion.

Step 7 – Repeat Steps :
Now that you finished, the first window stand back and admire your handy work for a little bit. Then repeat steps 2-6 for the other windows.
Enjoy Your Garage Door Windows!
And just like that you revitalized your garage door at a fraction of the cost. Think of those garage windows as more than just a facelift; they’re about lighting up spaces and boosting value. With a bit of care and the right tools, you’re on your way to a brighter garage.